Nightingale’s Tully Lakes Hardware – Getting Ready to Raise Baby Chicks this Spring
Posted by Dustin Horton // February 10, 2021 // Local Business
At Nightingale’s Tully Lakes Hardware, the arrival of baby chicks into the store is a sure sign that Spring is just around the corner. Customers place orders for their choice of breeds in February and pick them up when they are delivered to the store during the last week of March. If you decide to order chicks, New York state requires you to purchase a minimum of six- but you can mix and match between breeds. Stop in the store for an order form to reserve your favorite breeds. This year, Nightingale’s is offering buff orpingtons, columbian wyandottes, black australorps, buff cochins, dominiques, red leghorns, and speckled sussex. (Typically, extra chicks are also available for people that did not pre-order in advance.) Nightingale’s has poultry supplies, Nutrena Feeds, Keystone Feeds, and Dengie Farm Feeds to get you started with your new chickens.
You’ve just arrived home with a brimming box of peeping chicks, how exciting! The journey you are about to embark on is an exciting one, so get ready to learn about chick life stages and love those new fluffy creatures.
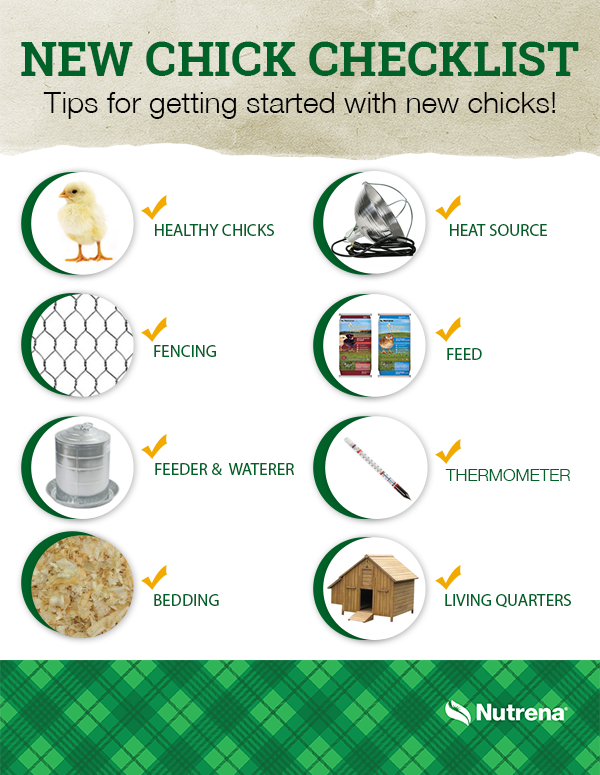
What to Expect – Week 1: Before you go to pick up your new chicks, make sure the brooder is ready to go at home. This will prevent any unnecessary stress, for both you and the chicks.Chicks thrive in ideal conditions, so consider these tips for getting started-
- Heat: Suspend a warm bulb about a foot above the brooder floor for warmth – and have a second bulb on hand in case one burns out. Keep temps in the brooder about 90-95 degrees F for the first week, decreasing about 5 degrees per week. Raise the light as chicks grow.
- Environment: Be sure your brooder is big enough so your chicks can move about comfortably. Keep it out of drafts. Stock tanks, plastic tubs and homemade brooders are a few good options. Do not allow the brooder to become wet or damp.
- Bedding: Pine wood shavings are ideal. Avoid straw and newspaper as these become slippery for chicks. Clean bedding daily.
- Water: Be sure clean, fresh water is always available. Elevating the waterer a couple inches off the floor will help it stay clean and prevent bedding from contaminating it.Don’t forget, the journey to their new home was a long one, so consider providing some water with vitamins and electrolytes for the first few days.
- Feed:. Have chick starter feed available 24/7. Your chicks will eat just what they need. One chick will eat about 10 pounds of chick starter in its first weeks of life. There are some great options available when considering chick starter feeds.
Expect some peeping as the chicks get acquainted in their new environment, learning to drink and eat. They will likely do this for 4 or 5 days. If the peeping seems to be excessive, make sure you evaluate the brooder for anything that may be causing distress. A good indicator on temperature is to evaluate where the chicks are located. If they are spread out, they are likely comfortable. If they are huddled under the heat source, they may be too cold and temperature adjustments should be made.If they are on the edges of the brooder (not under the heat source) then they are likely too hot.
What to Expect – Week 2-3: After the first week, their down will start to turn into feathers, and by week 4 you can expect to see more feathers than down.With adequate food, water and proper temperature, your chicks should be acclimating quite well to their new home. Don’t forget the importance of brooder maintenance during this time.To keep odors at bay and cleanliness paramount, make sure you are cleaning out the brooder once a week and adding fresh shavings.Place the waterer in the corner to prevent dampness throughout the entire brooder.
What to Expect – Week 4-6: At this time, you may notice your chicks starting to test their wings.At week 6, the brooder is likely getting a little crowded, and you should consider the transition outside to the coop.It’s wise to choose a nice day to do this, as it will be less of a shock to the birds.It’s important to note that during this transition, you should make sure your chicks are fully feathered so they are prepared for the elements.The change in environment can be a big one for your chicks, so consider these tips as you move them from brooder to adult coop:
- Chicks should be mostly feathered – At 5 to 6 weeks your fluffy chicks will start to resemble adult birds by growing out pinfeathers.
- These adult feathers will help them regulate their body temperature better than fluffy chick down.
- Chicks should be acclimated – Although they start off at 90 – 95 degrees in the brooder the first week of life, you need to decrease this temperature each week until the temperature inside the brooder is close to what daytime temps will be. For the first few weeks (and especially if outdoor temperatures are fluctuating), you may want to bring the birds back into the brooder at night or in bad weather.
At this point it is also important to remember, if you have youngsters joining your existing flock, to only feed chick starter to all birds until the youngest bird is 16 weeks.Otherwise the extra calcium in regular layer feed can harm young chicks. Once you’ve reached the 16 week mark, it is safe to switch to layer feed. Your hens will most likely not be laying until they are around 24-26 weeks old, but it is important to build up the calcium level in their system. Using a layer crumble makes the transition a little easier.Chicks should also be eating treats and grit by now. It’s a great idea to get your birds used to eating treats (if you plan to offer them) a few days prior to putting them outside. That way, you can use the treats to lure the birds into a secure space at night, if needed.Until they are used to thinking of the coop as “home base” they may need just a bit of encouragement to go back in at night.